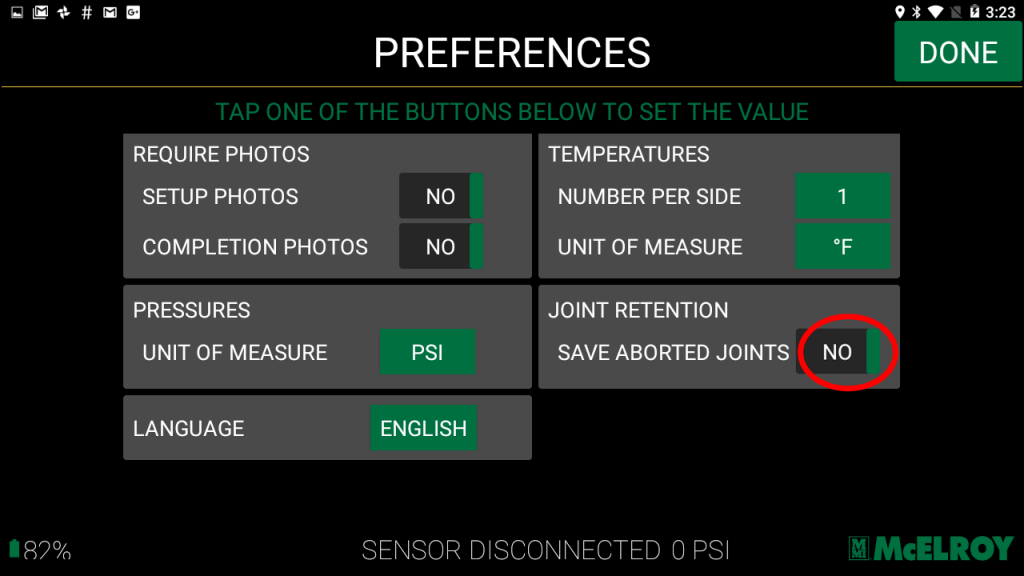
1. Before aborting a joint, ensure the setting “save aborted joints” is set to “YES” in your Preferences.
Settings > Preferences > Joint Retention: Save Aborted Joints > “YES”
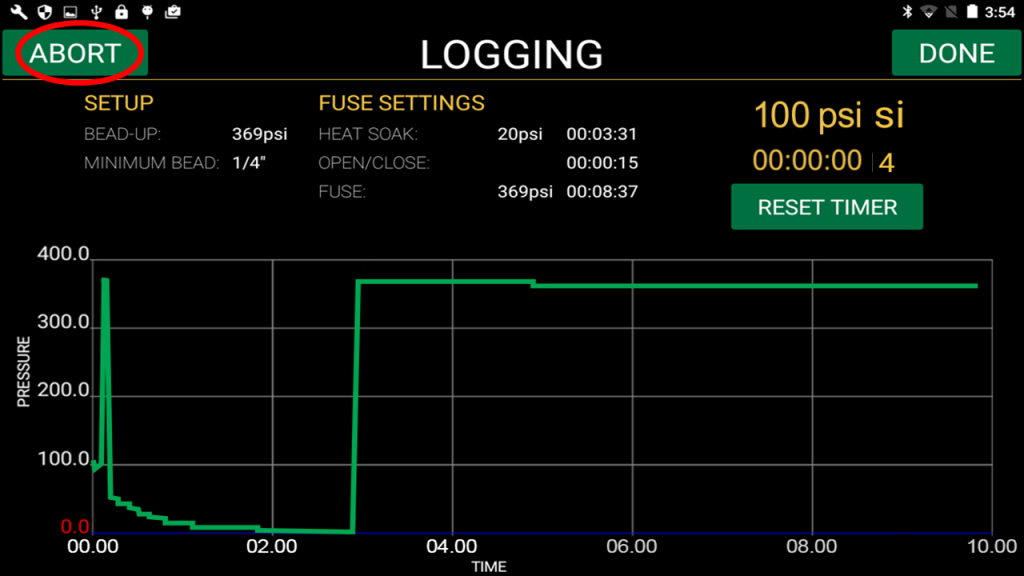
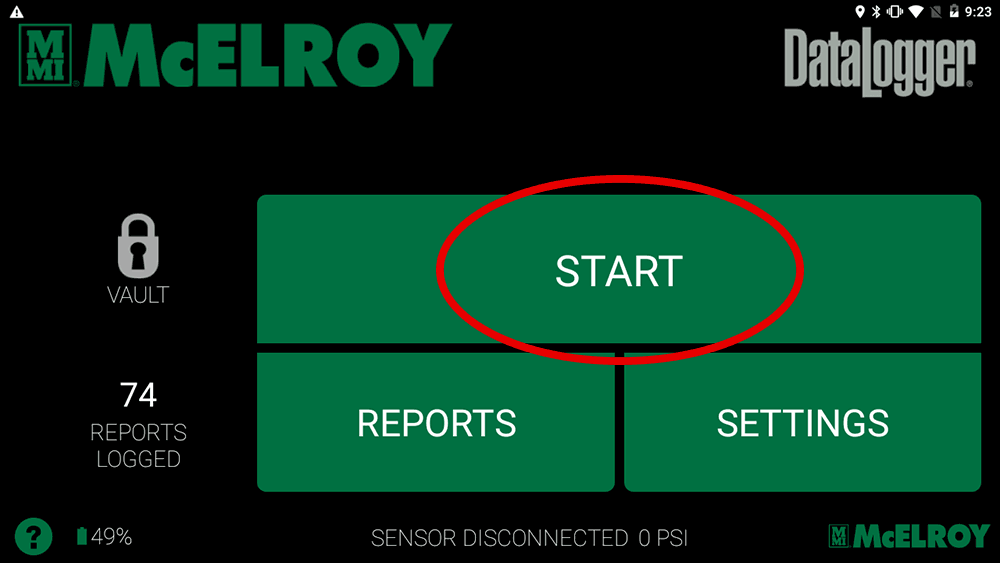
2. At any time during the fusion process, push the “ABORT” button in the top, left-hand corner of the screen to stop the recording process.
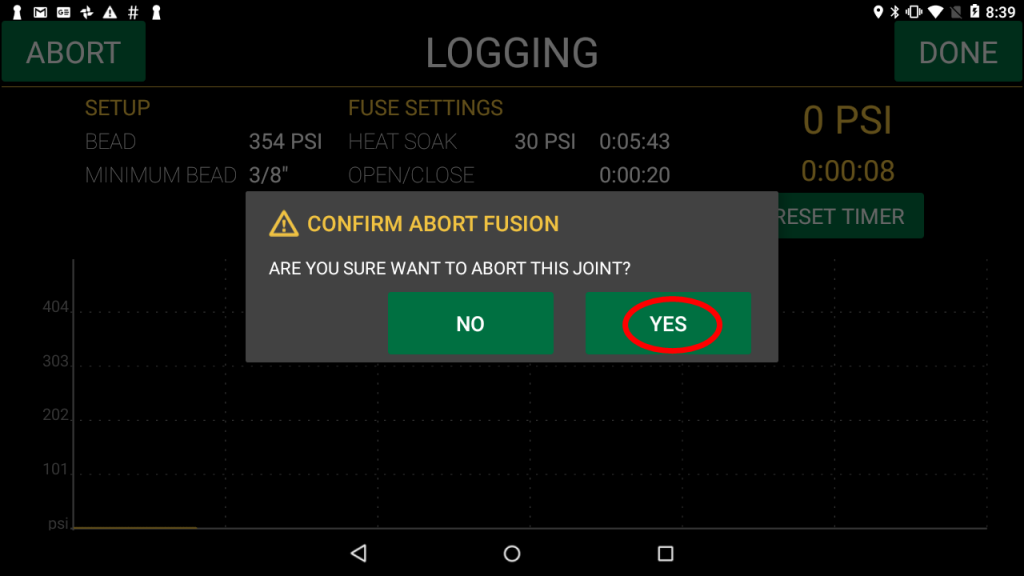
3. A pop up box will appear to confirm you want to stop this fusion.
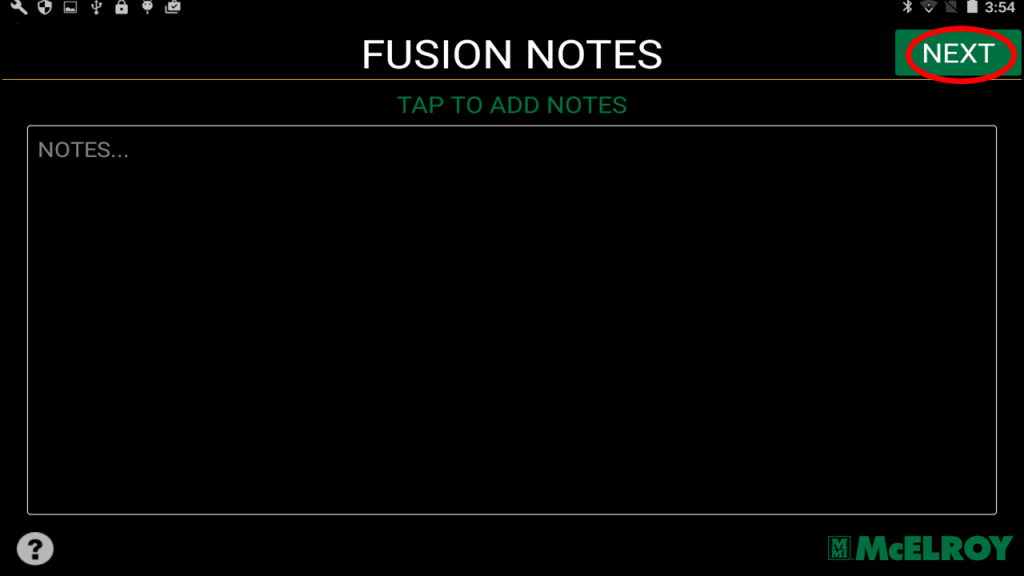
4. Add any fusion notes and/or completion photos on the following screens and select “NEXT”.

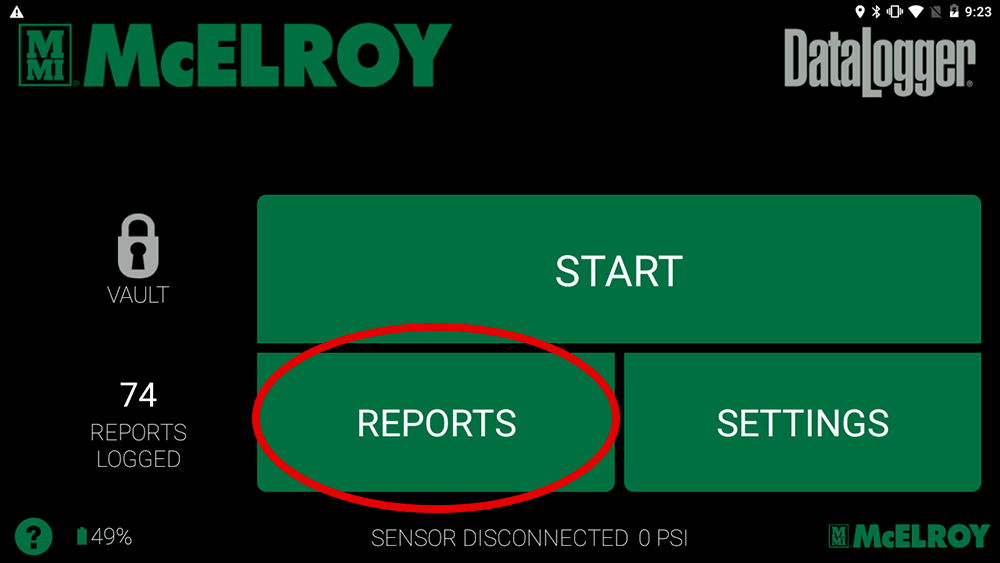
To view aborted job records, select “Reports” from the start screen.
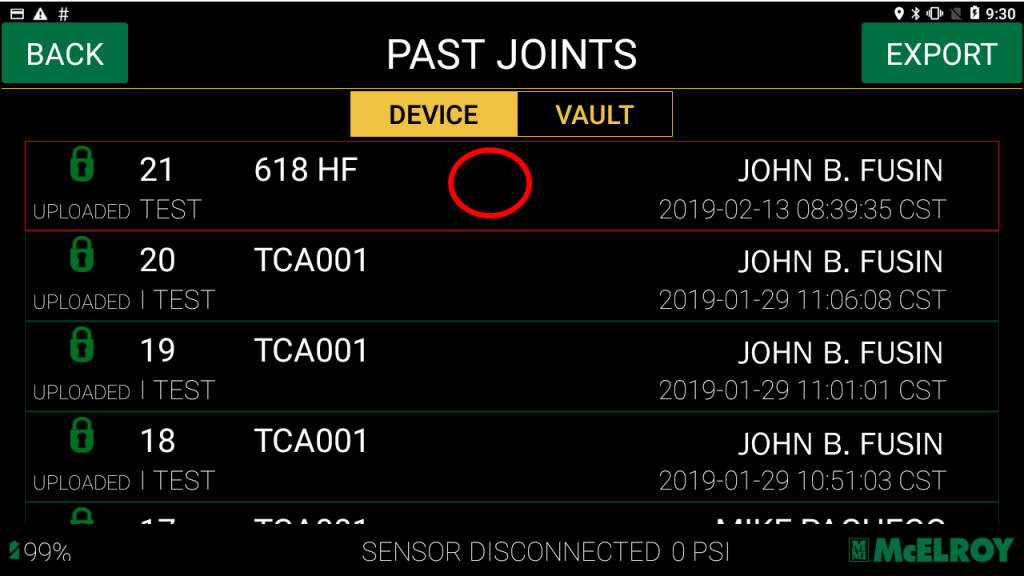
Select the joint.
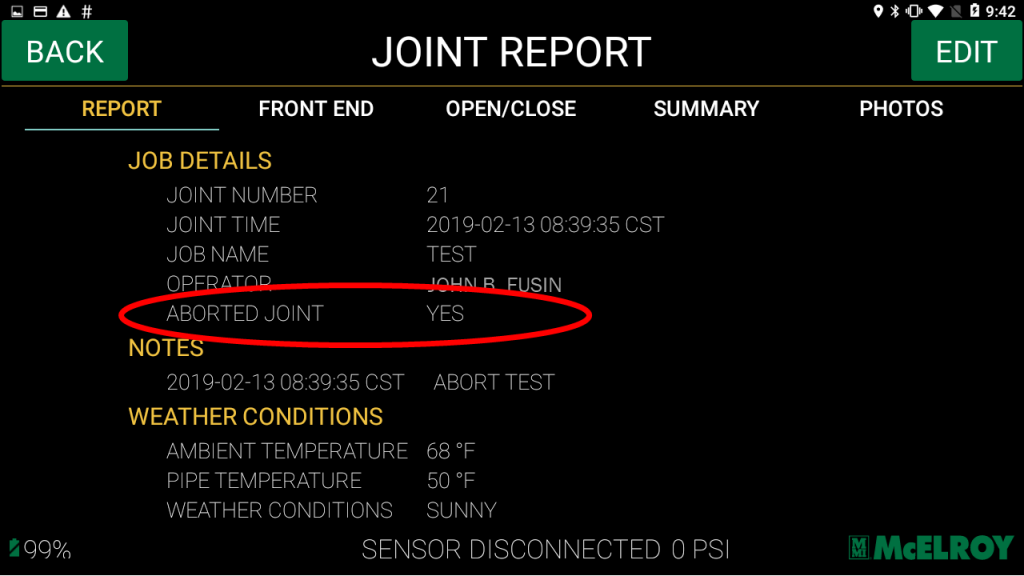
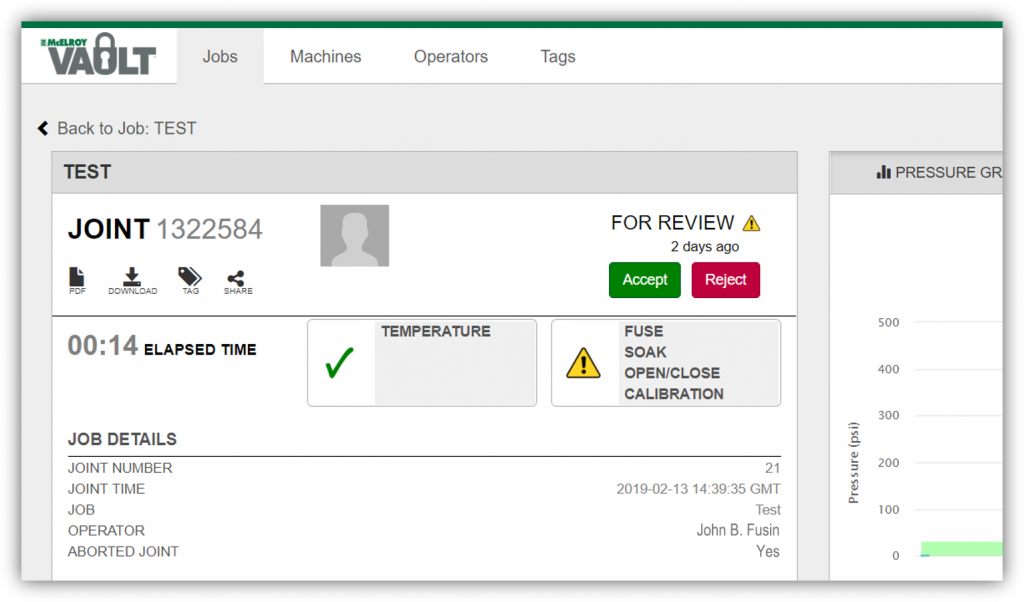
Note the aborted joint status is “YES”.
The joint will also be noted as aborted in McElroy Vault™.
Once the fusion is completed properly, there will be two instances of the joint.
The first is the aborted record and the second is the completed record. This is due to the unique ID assigned to each record by the DataLogger® Vault™ integration when uploaded.

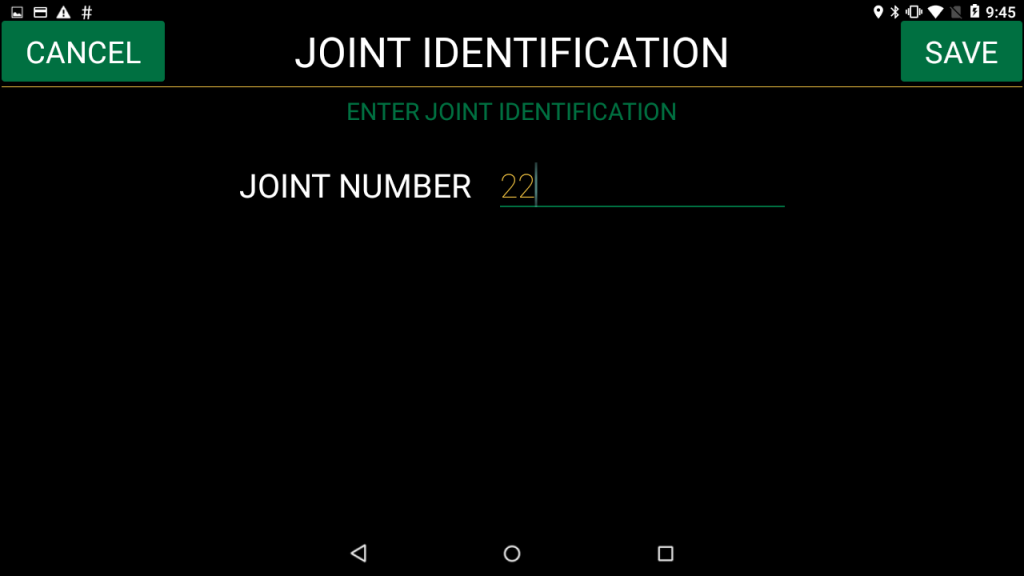
It’s important to consider the sequencing of the joint ID.
Even if a joint is aborted, the DataLogger ® will automatically sequence to the next joint number. If desired, you can set this back to the original joint ID.
During setup of the next joint, select the “Joint ID” button.
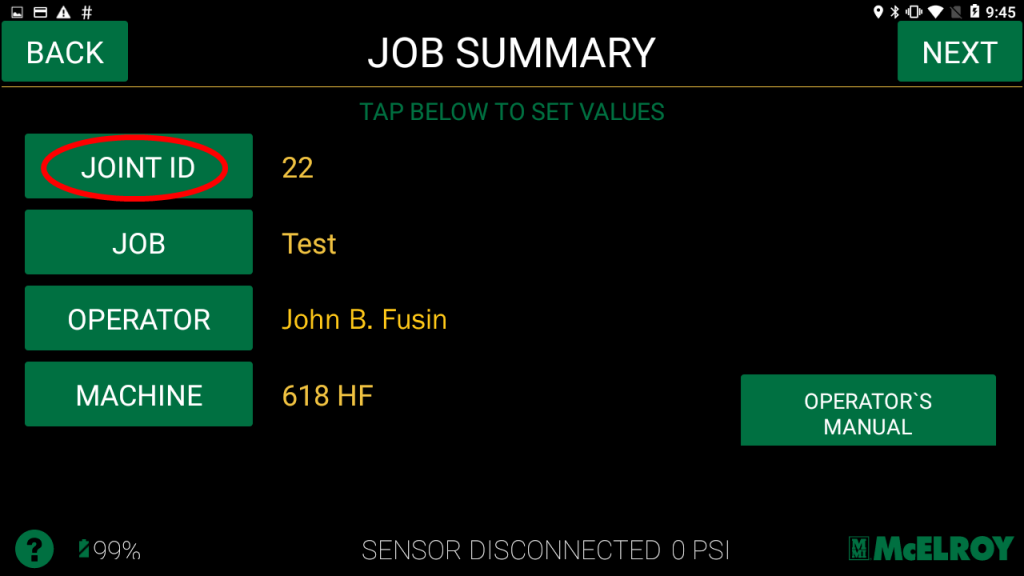
Now change the joint number and click the “Save” button.