Auto Backup fusion records to an SD card on the DataLogger®

Auto backup is a great feature on the McElroy DataLogger that allows fusion operators to back up their joint reports to a Micro SD card. The 1.16 release builds a redundancy into the system so that you will be prepared in the event of any jobsite contingency. Think of it as an added backup in addition to the McElroy Vault™ to ensure that all of your fusion data is safe.

Once you install a Micro SD card in your DataLogger tablet, you will need to format the card in order to activate the auto backup. You’ll only need to do this once and it’s easy!

1. For the DataLogger 7: Slide the battery compartment to the unlocked position.
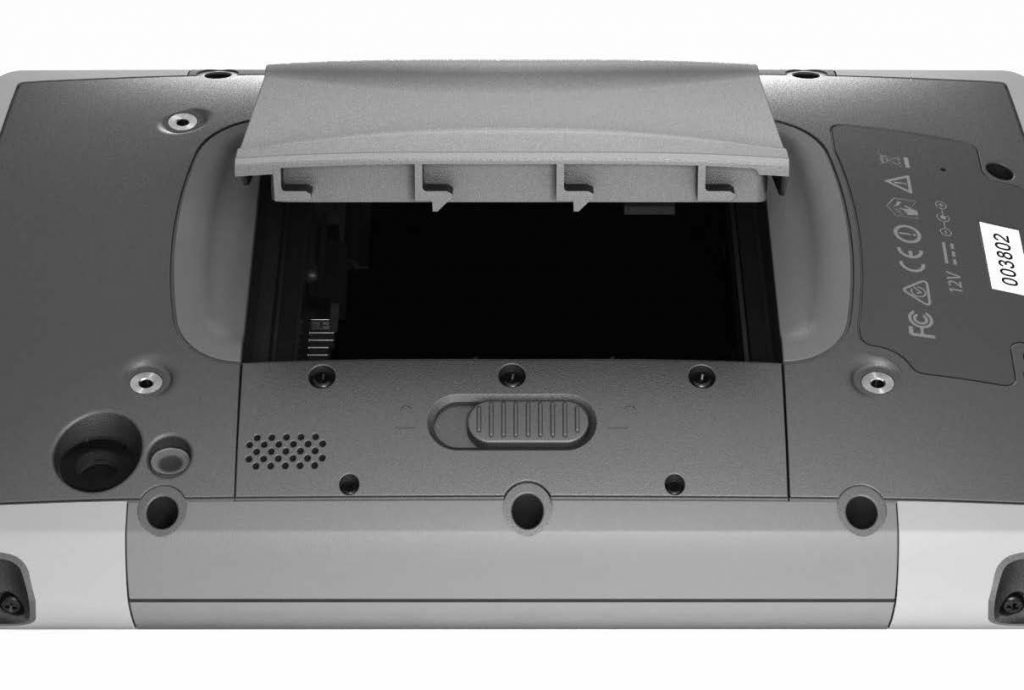
Close-up of the underside of an electronic device showing an open battery compartment with the cover flipped up, exposing the interior slot. Various screws, labels, and vent holes are visible on the gray and black casing.

Remove the compartment door and battery.
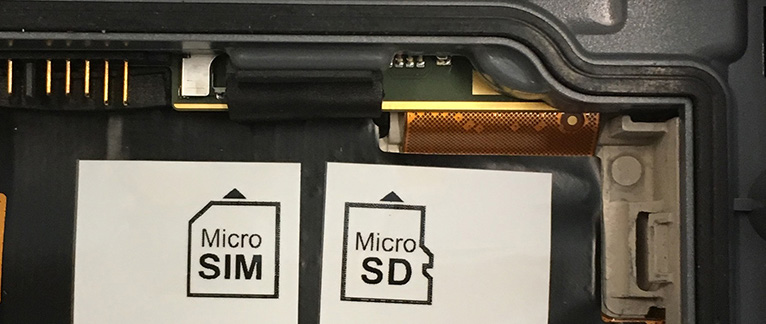
A close-up of a device’s interior showing labeled slots for a Micro SIM card and a Micro SD card, with connectors and circuit components visible around the slots.

Pull flexible card holder out of the way and insert SD card into the proper slot. Replace flexible card holder, battery and compartment door.

For the DataLogger 6: Remove the screw from the SD/SIM card cover and flip open the cover.
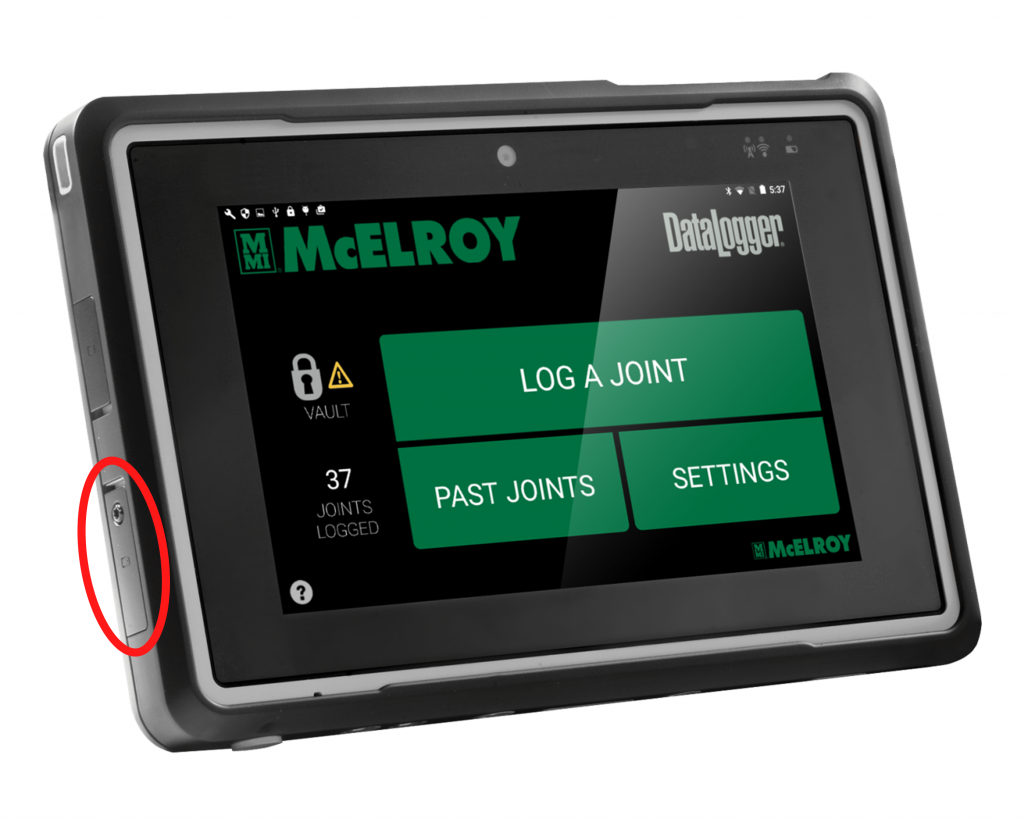
A McElroy DataLogger electronic tablet displays options for logging joints, viewing past joints, and changing settings. A red circle highlights buttons on the left side of the device.

INSERT THE MICRO SD CARD INTO THE SD CARD SLOT.
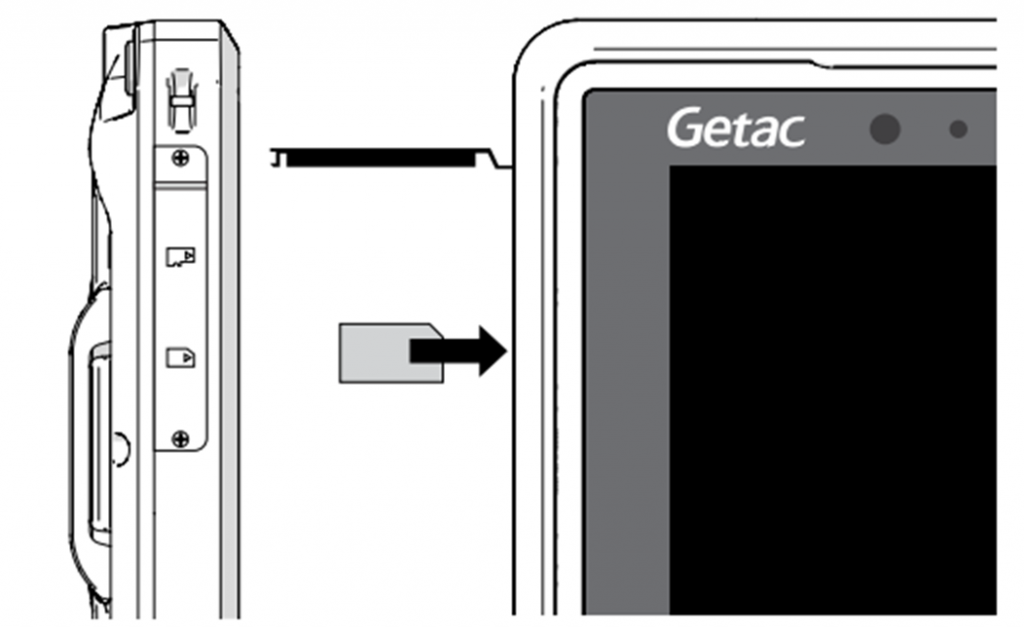
Black and white illustration showing the side view of a Getac device with an arrow pointing to an SD card slot, indicating where to insert a memory card.

2. ONCE AN SD CARD IS INSTALLED, GO TO THE SETTINGS OF THE DATALOGGER APPLICATION THEN SELECT “SYSTEM”.
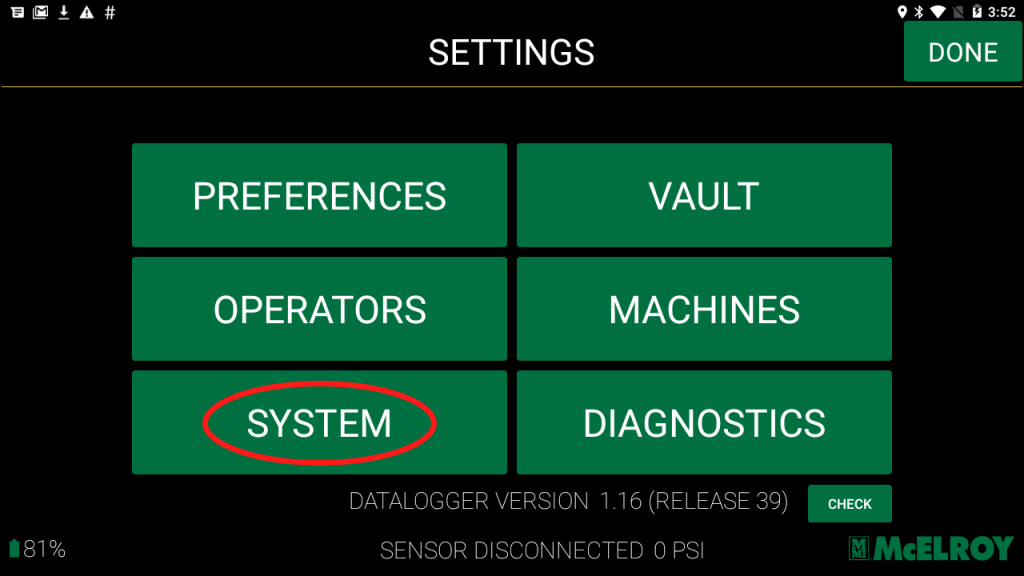
A tablet screen displays the SETTINGS menu with six green buttons: PREFERENCES, VAULT, OPERATORS, MACHINES, SYSTEM (circled in red), and DIAGNOSTICS. The DONE button is in the top right corner.

3. SELECT THE “SD CARD STATUS” BUTTON AT THE BOTTOM OF THAT PAGE.
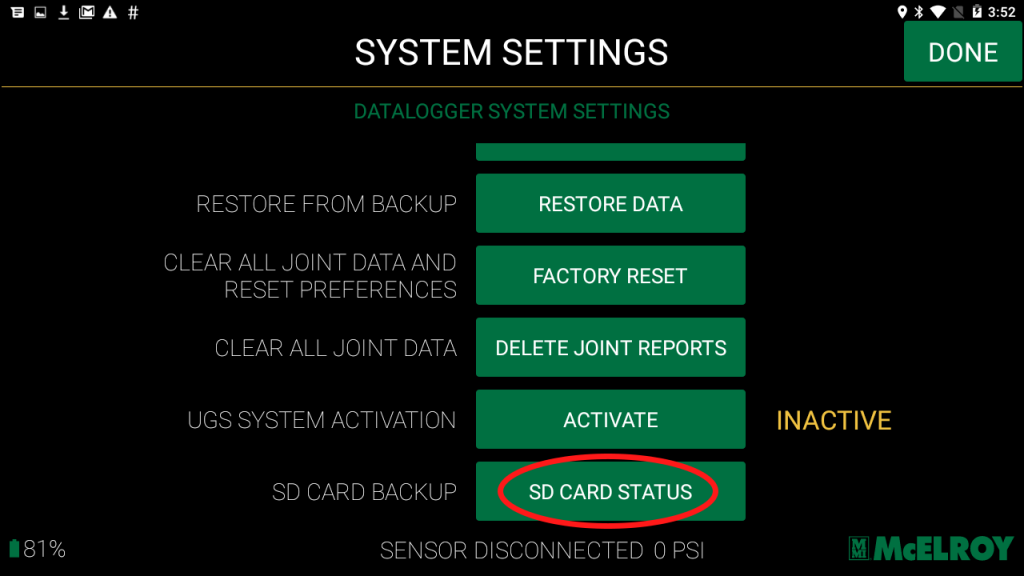
A digital screen shows SYSTEM SETTINGS with options like RESTORE DATA, FACTORY RESET, and SD CARD STATUS (circled in red). Status indicators show INACTIVE and SENSOR DISCONNECTED 0 PSI.

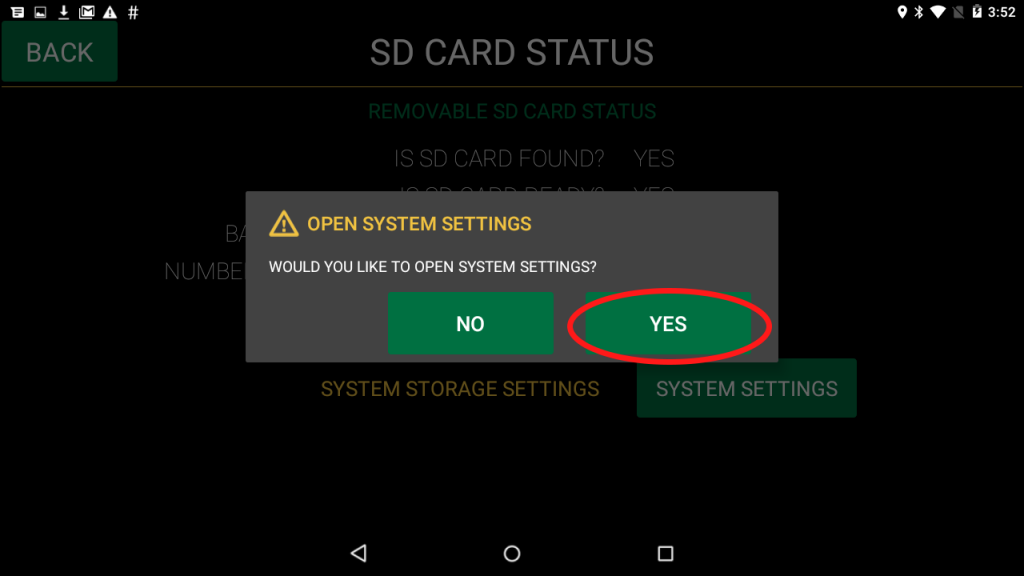
4. ONCE ON THE SD CARD STATUS PAGE, SELECT “SYSTEM SETTINGS” THEN “YES” TO THE POP-UP CONFIRMATION.
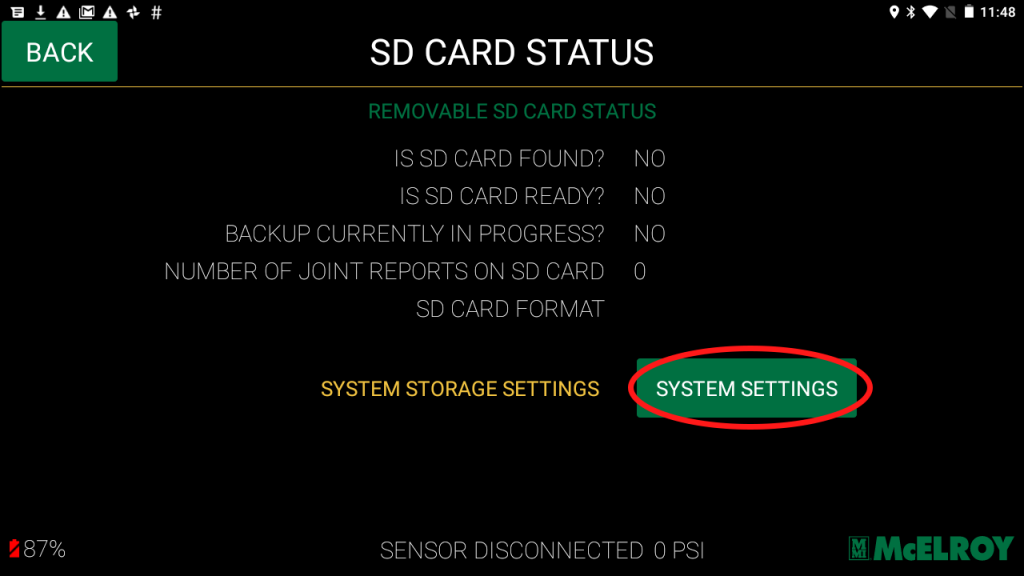
A digital screen shows SD card status with all checks marked “NO.” SYSTEM SETTINGS and SYSTEM STORAGE SETTINGS buttons are below, with SYSTEM SETTINGS circled in red. Battery is at 87%. McElroy logo at bottom right.
A dialog box on a screen asks, Would you like to open system settings? with NO and YES buttons. The YES button is circled in red. The background shows an SD card status menu.

5. SCROLL DOWN AND SELECT “ERASE USB/SD CARD STORAGE”; THIS WILL FORMAT THE CARD FOR USE. THIS STEP MAY TAKE A MINUTE. SELECT “YES” TO THE CONFIRMATIONS.

**IT’S IMPORTANT TO NOTE THERE ARE OTHER FORMATTING OPTIONS, PLEASE ENSURE YOU SELECT ONLY THE “ERASE USB/SD CARD STORAGE” OPTION.
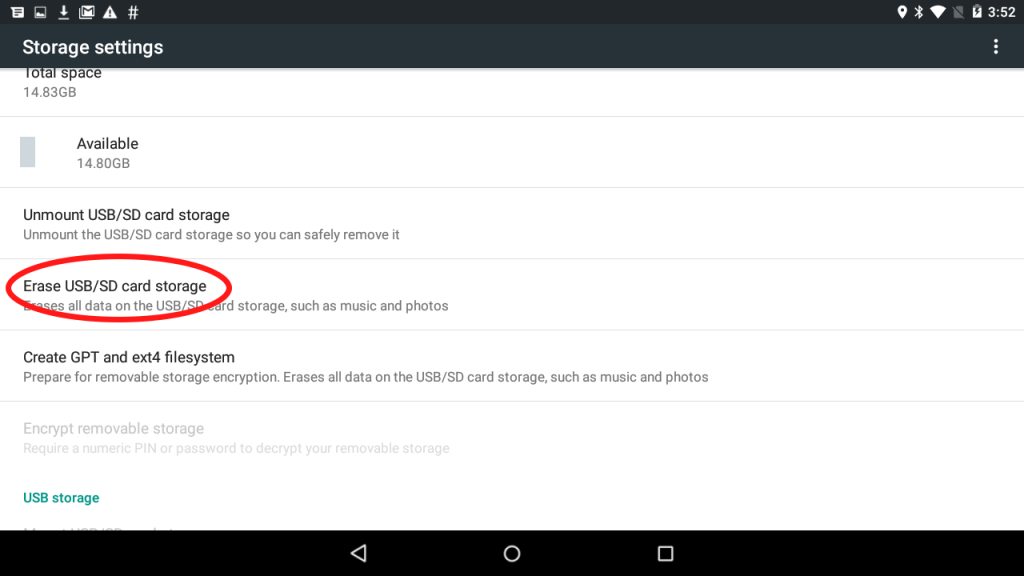
Screenshot of a tablets Storage settings. The option Erase USB/SD card storage is circled in red, indicating where users can erase all data from external storage. Other options include unmounting storage and creating a filesystem.

6. HIT THE BACK BUTTON TO GET BACK TO THE DATALOGGER APPLICATION.

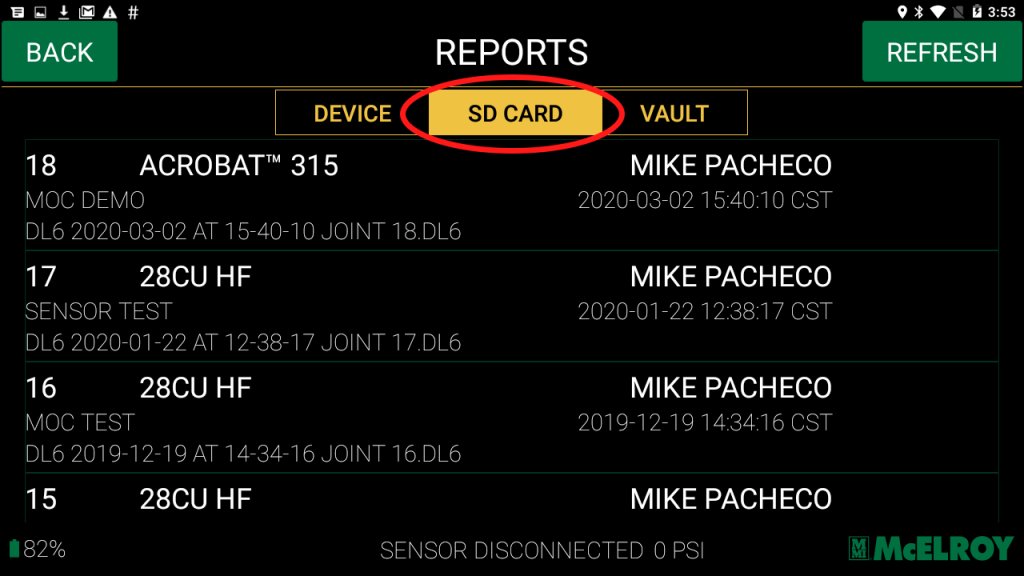
A digital screen shows a REPORTS menu with tabs for Device, SD Card (highlighted), and Vault. Several reports are listed with IDs, names, dates, and users. Green buttons for Back and Refresh are at the top corners.

7. YOU WILL SEE THE CARD FORMATTED AND THE JOINTS AUTOMATICALLY BACKING UP TO THAT CARD.
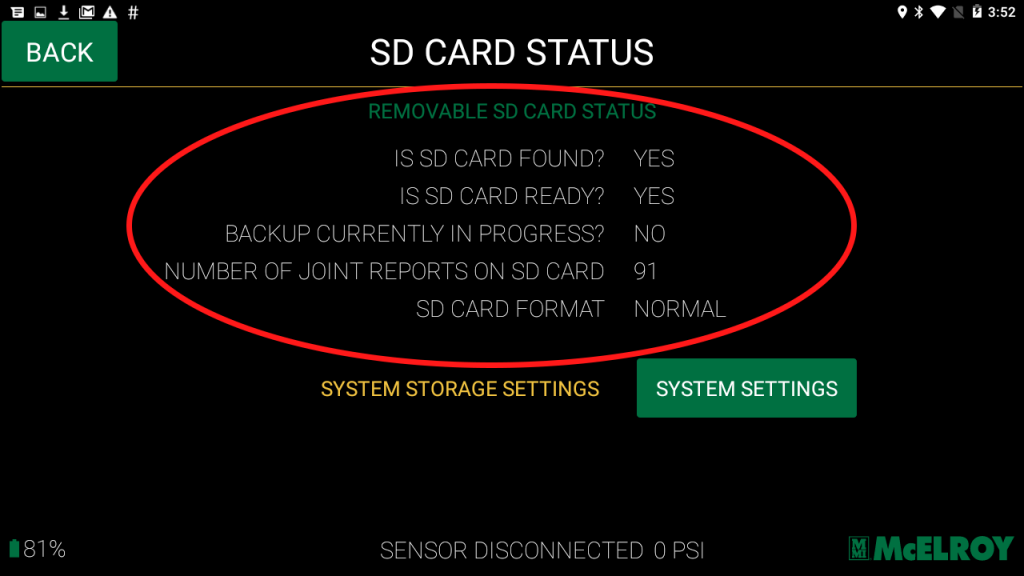
8. TO VIEW, GO TO THE REPORTS PAGE AND SLIDE OVER TO THE “SD CARD” SELECTION.

Now all fusion joints performed will back up automatically to this card. If ever needed, you may take the card out and upload reports to the Vault as they are the standard .DL6 file type.