We get it – technical difficulties happen. Losing the fusion data stored on a DataLogger® is a situation no operator or contractor wants to find themselves in.
McElroy already offers the Vault™, a powerful cloud-based tool that stores fusion data. But as an added data-storing feature, a Micro SD card is pre-installed to the DataLogger 7’s onboard storage expansion slot. The Micro SD provides a redundant backup of fusion records, giving operators yet another level of peace of mind when it comes to holding onto important fusion information.
When installing a new Micro SD card into the DataLogger tablet, the card must first be formatted to activate automatic backup. Following these steps makes this process quick and easy:
1. Insert the SD Card
For the DataLogger 7: Slide the battery compartment to the unlocked position, then remove the compartment door and battery.
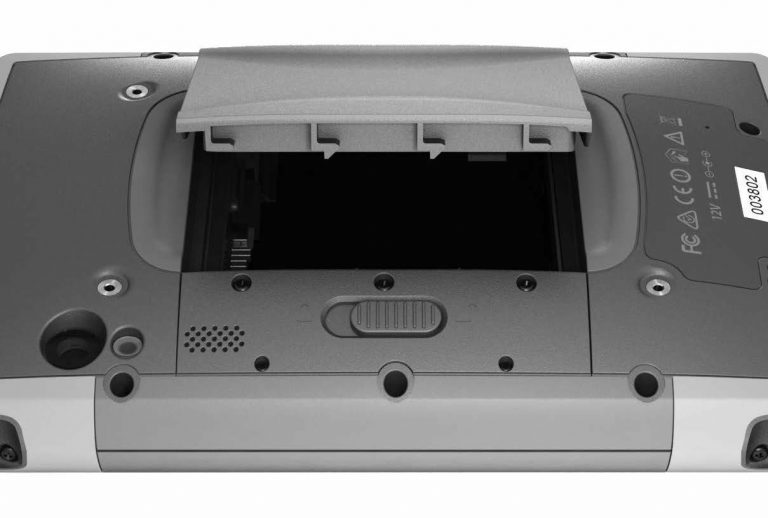
Pull the flexible card holder out of the way and insert the SD card into the proper slot. Replace the card holder, battery, and compartment door.
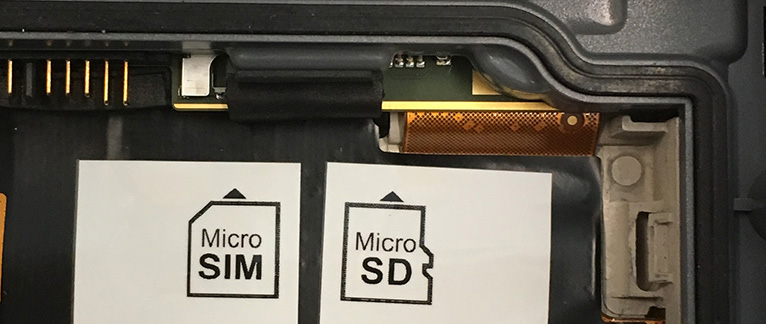
For the DataLogger 6: Remove the screw from the SD/SIM card cover and flip open the cover. Insert the Micro SD card into the SD card slot.
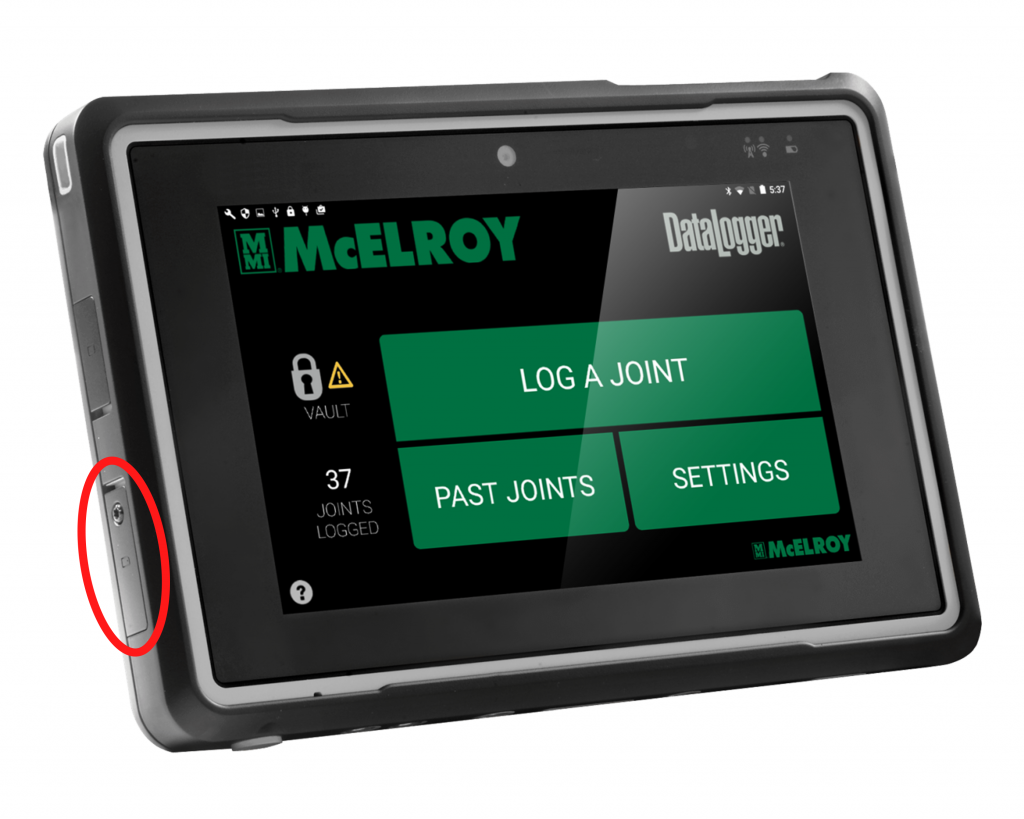
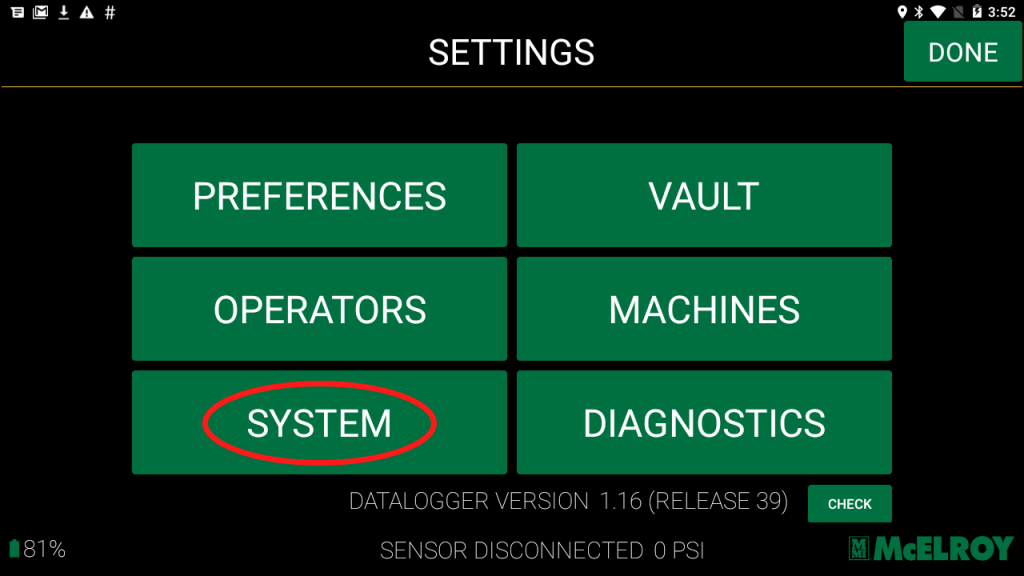
2. Once an SD card is installed, go to the Settings option on the DataLogger application, then select “System.”
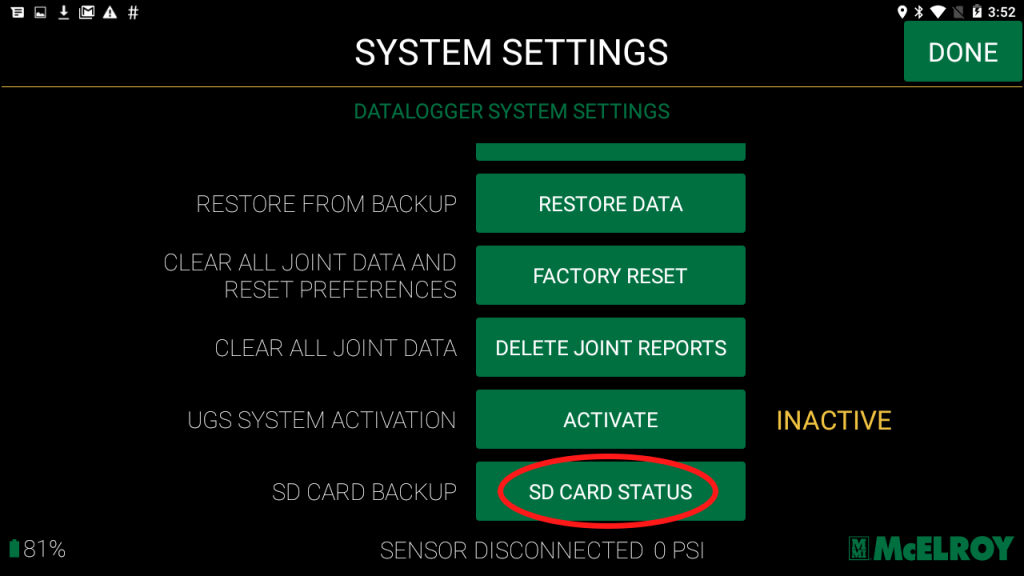
3. Select the “SD Card Status” button at the bottom of the page.
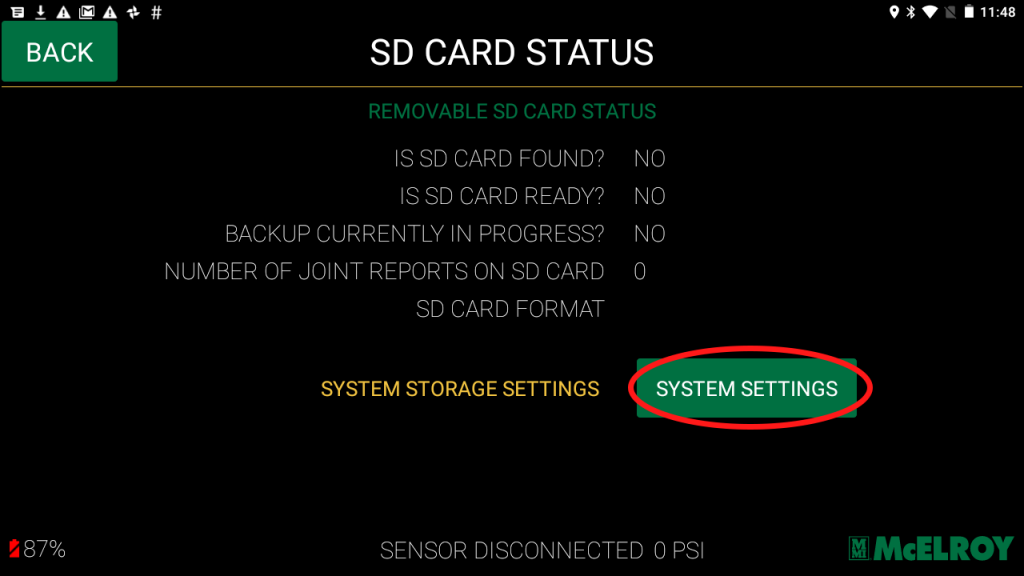
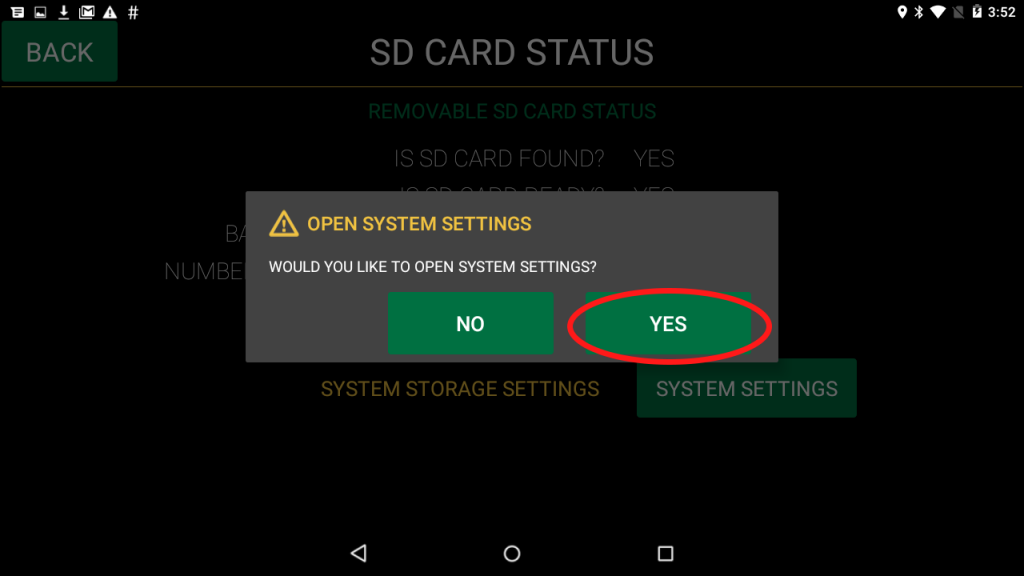
4. On the SD Card Status page, select “System Settings,” then “Yes” to the pop-up confirmation.
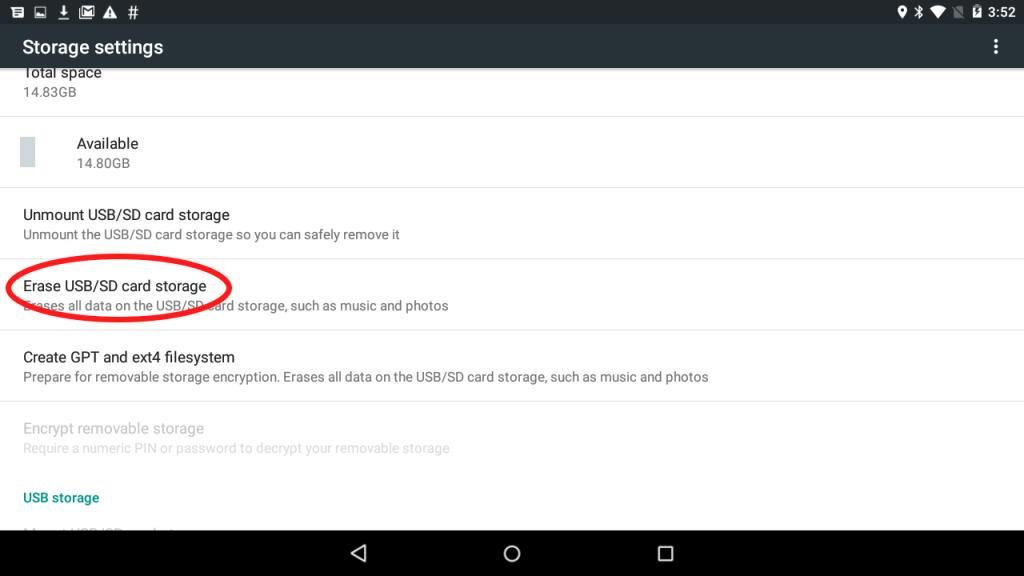
5. Scroll down and select “Erase USB/SD Card Storage.” This will format the card for use and may take a moment to complete. Select “Yes” to the confirmations.
Note: There are other formatting options on this screen. It’s important to select only the “Erase USB/SD Card Storage” option. Also, note that this will remove all prior data stored on the SD card, such as music and photos.
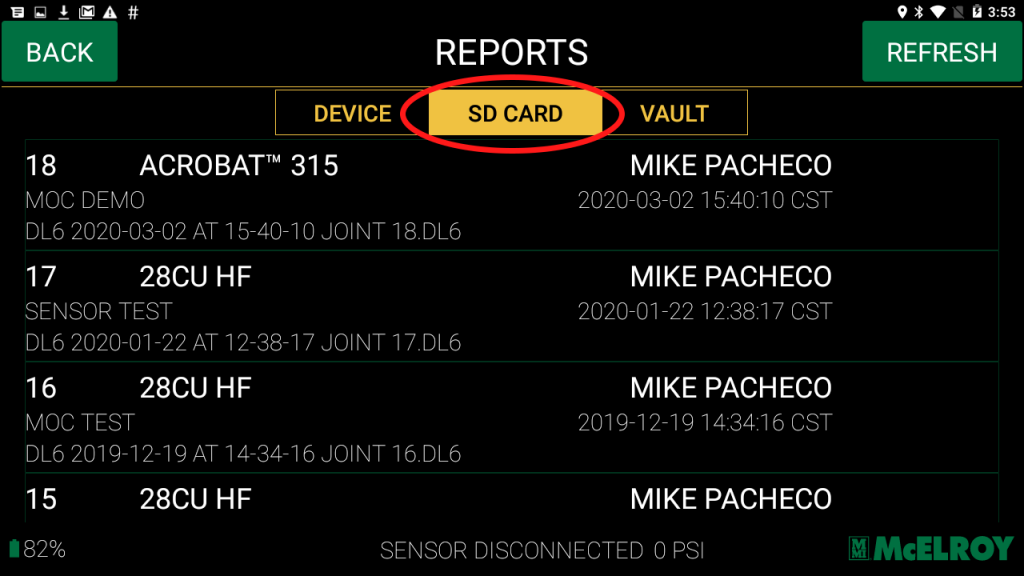
6. To view future reports on the SD Card, go to the Reports page and slide to the “SD Card” selection. There, you will see all fusion joints automatically backed up onto the card. If needed, you can remove the card and upload reports manually to the Vault.